
Bad hip flexors? Stretches for hip pain
By Team EtchRock in EtchRock

If you’ve ever had bad hip flexors, then you’ll know what a debilitating injury it can be. The hip flexor is responsible for significant movement in your legs, specifically lifting your thigh. When it is ruptured or torn, you will most likely experience serious pain or impeded movement. If you work in an office, you are at a higher risk of exposing yourself to this injury if you don’t have a proper warm-up as the hip flexor lays dormant for long portions of the day.
As someone who experiences chronic hip pain, we asked our marketing manager Jason to go through his stretching routine and show us how he regularly rehabs this injury.
I’ve always had a bit of a dodgy hip and it’s been somewhat of a recurring problem. But as an American football player, I need to keep this injury in check because the sport is extremely demanding. So I thought I would share a few of the stretches that I do twice daily to rehab my hip flexor to hopefully give you a hand.
Please bear in mind; these exercises are in no way a replacement to see a physician. There is a very fine line between being hurt and being injured and if there is any doubt in your mind that there could be something seriously wrong, get it checked out. But if you’re anything like me and eager to get back to training, then this could help you out and get you back on track sooner rather than later.
If you have just injured your hip flexor, first off, get some ice on it! Any injuries best friend. I like to do 20-minute intervals on and off for as long as possible. You want to reduce the swelling and inflammation around the hip as that is what will start to cause you pain. Do this for a couple of days and rest until you feel ready to do some light stretching.
*Disclaimer. Please excuse the photos taken in the park after yesterday’s aggravation of the injury. As Brits, when the sun shines, we take every opportunity to be outside.
When you feel ready to start the process of stretching, we will start off easy and go with the standard knee down/forward lunge stretch first. Put your non-injured leg forward and try to create a right angle with your upper and lower leg, like I have demonstrated below.
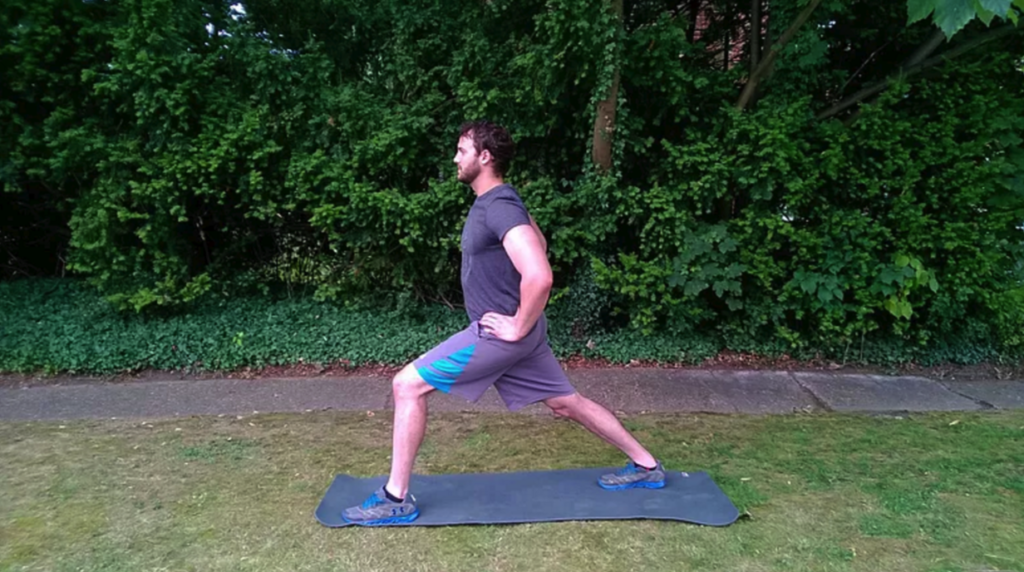
Slowly lower the knee on the injured leg to the floor, and start to gradually transfer the weight onto your front foot. You should start to feel a good stretch in the injured hip as you lean forward. Don’t overdo it; you just want to feel a light stretch. Hold this for about 15 seconds, then relax and do it again a couple more times.
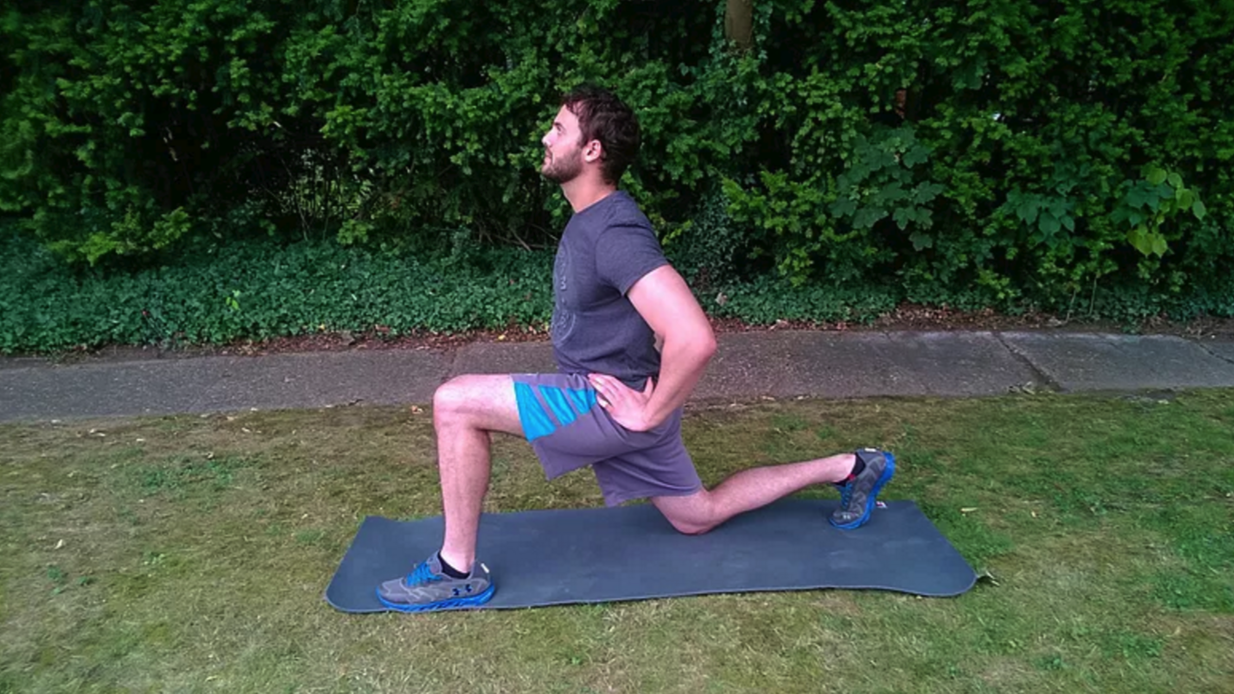
For the next stretch, I want you to reverse what you did for the previous one. So have your injured leg out in front. Follow the same steps as above until you get to the final stretch stage. From here, kick your front leg out a little (away from your body). If it helps your balance, you can do the same with your rear leg resulting in a wider stance.
Using your hands, push gently against the inside of your knee and away from the midline of your body. You should feel a nice stretch on your abductor muscle around your hip. I’ve put a picture below that shows what I have just explained. Again, take it slow, get a light stretch and hold and repeat for 15 seconds or so.
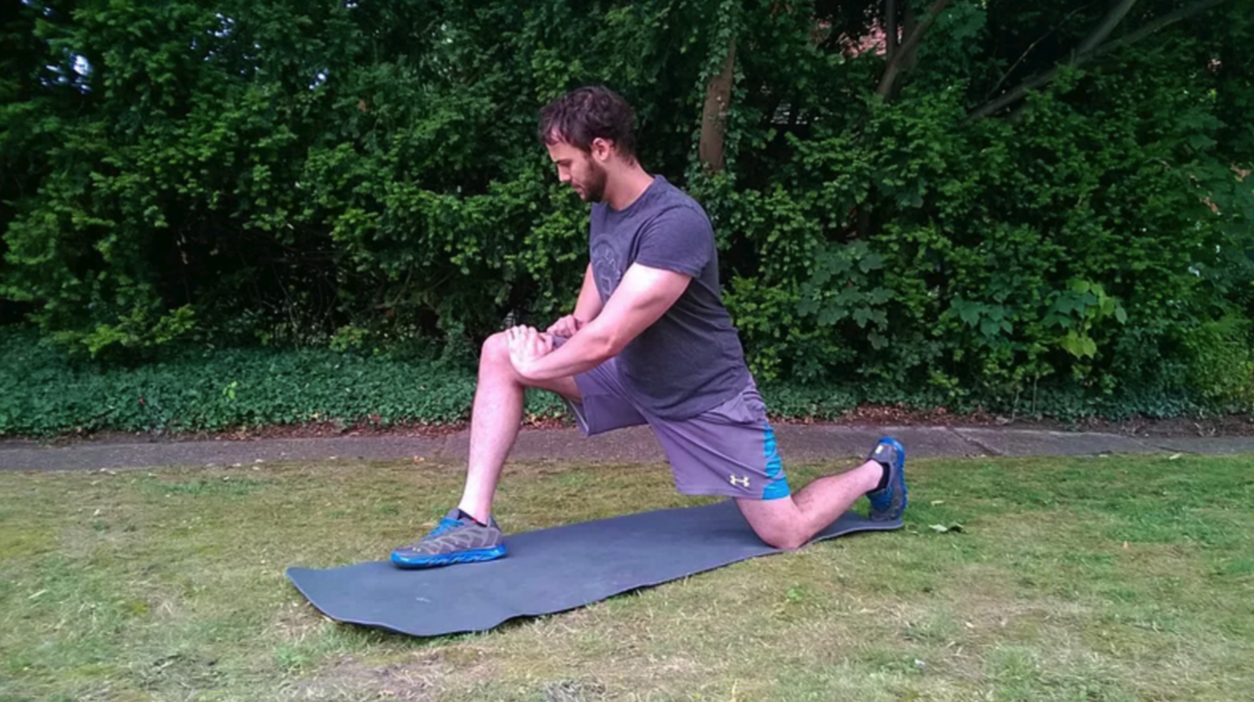
From here we are going to go into a yoga pose called ‘Pigeon Pose’. Use the previous stretch as your starting point, with your injured hip leg out in front. Slowly take your front leg and lay it out in front you so it runs parallel to your shoulders as a starting point. The picture below explains this better. This is quite a demanding stretch, so make sure you are comfortable with the position of your front leg. I have mine running parallel to my shoulders because it allows me to use my foot as something to lean on.
When comfortable, slowly push your hips through the front leg and hold. Really take it easy on this one if you have a fresh injury as it puts a lot of strain on your hip. On the other hand, it is my go to stretch before a leg day in the gym, nothing opens up your hips quite like pigeon pose!

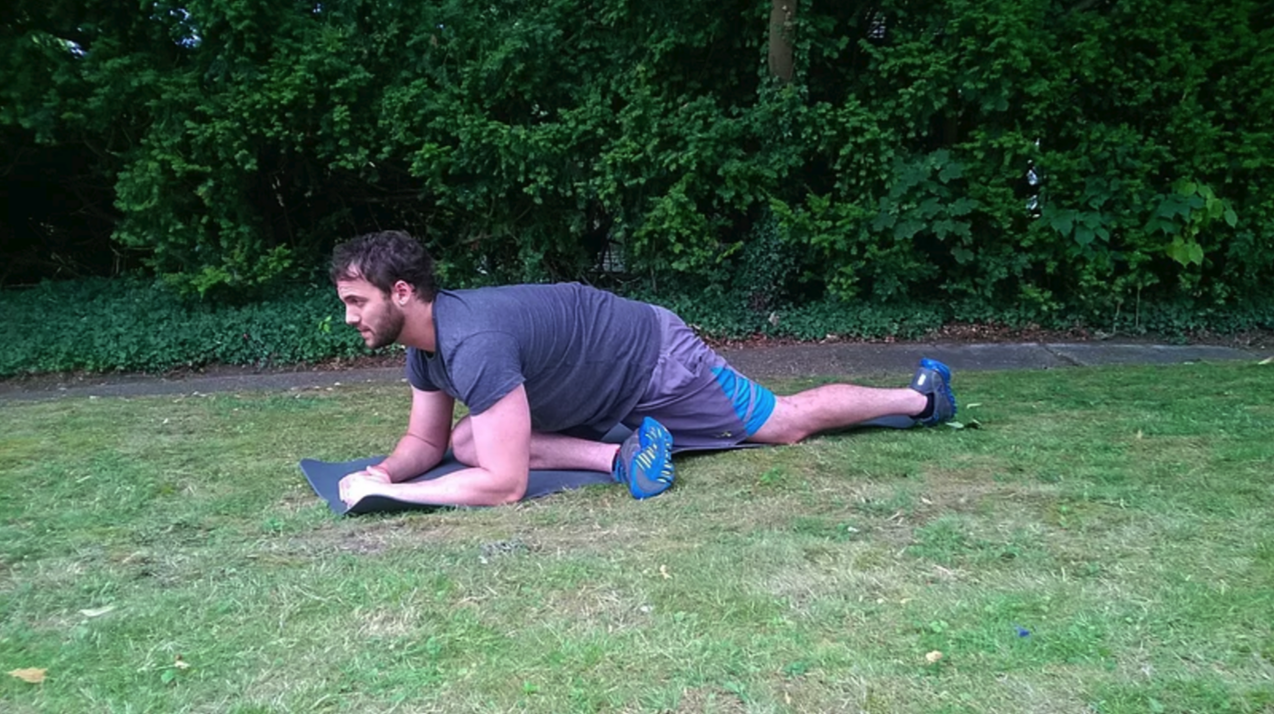
You can also take this one step further and bend over your front leg. Again as above, take it easy on this. You’re not looking to feel pain with these movements, just a gentle stretch. Slowly lower your torso over your front leg and hold, this adds another dimension to the pose. As you can see from the photo, I am not a yogi and resemble some form of contorted spider, but thanks for bearing with me on this one.
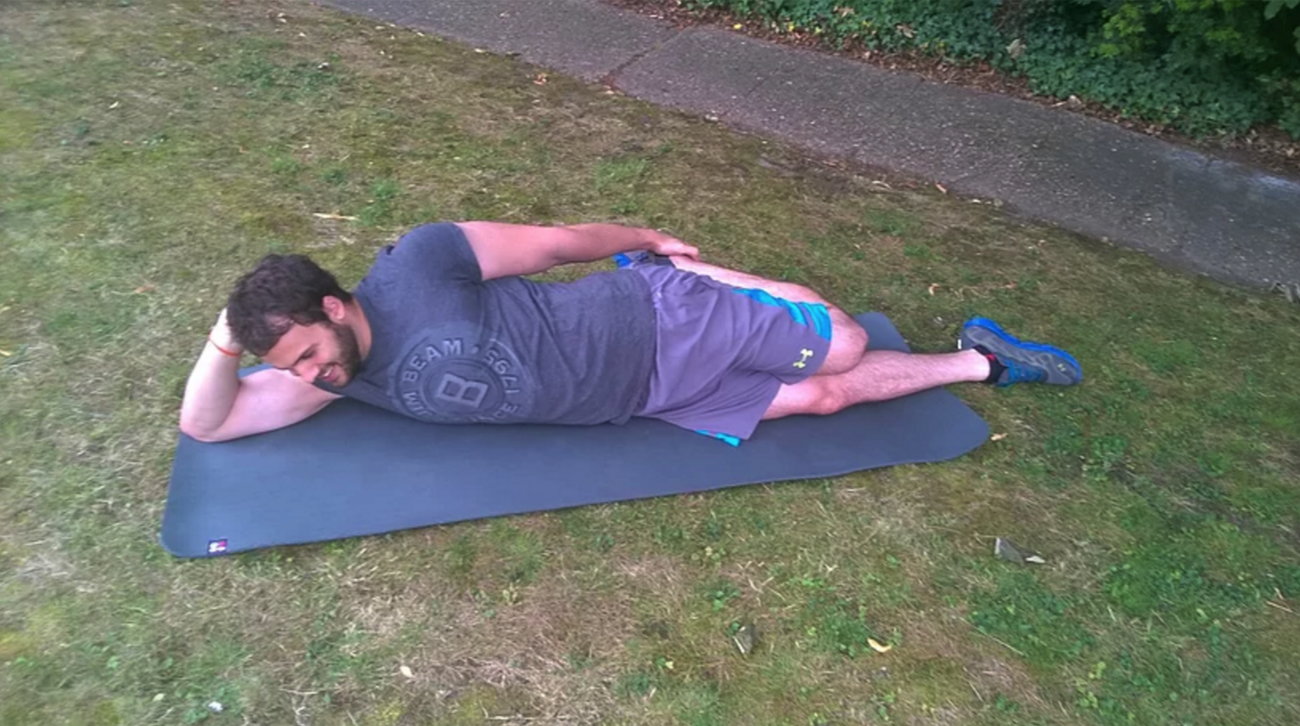
Lastly, we finish up nice and simple. Get on your side and pull the foot on your injured leg towards your glutes. I prefer to have my injured side away from the ground as it allows you that little bit of extra mobility when it comes to finding that stretch point. You are looking to feel tension both in the front of the quad and your hip flexor. As always, hold for about 15 seconds, rest and repeat.
Hopefully, this will help you out if you have any pain in your hip through injury. Alternatively, it is a great stretching routine to start off leg day at the gym. I find that after doing this I have greater mobility and power in all my squatting exercises. As I mentioned earlier, don’t use these stretches as a replacement for seeing a medical professional. Hip flexors are relatively easy muscles to tear, as people tend to forget to warm up their hips properly before exercise.
Don’t forget to subscribe!